Welcome to this month’s Ink, Stamp, Share Showcase Blog Hop
My showcase project this month is a fancy fold birthday card that I made for my daughter whose birthday was earlier this week.
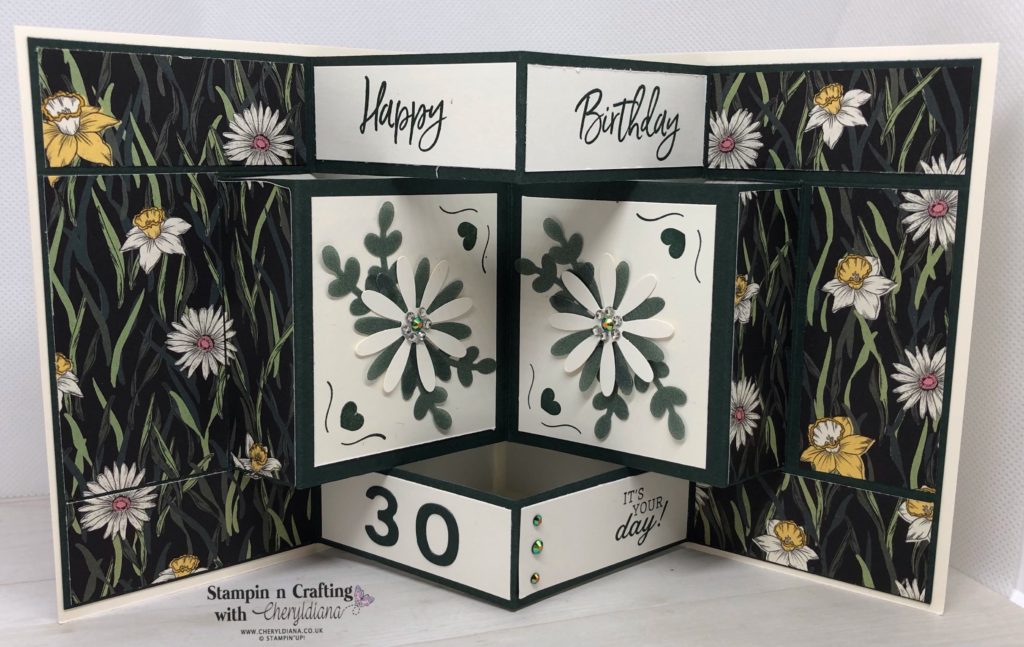
How to make the fancy fold card base and inside of the Birthday card
I started with a 12″x12″ piece of Basic White card stock and cut it in half to make a 12″x6″ piece. I then scored along the long edge at 6″ to make a 6″x6″ card base. Next I took an A4 piece of Evening Evergreen card stock and cut it at 11.5″x5 3/4″. I then scored along the 11 3/4″ side at 3″, 5 7/8″ and 8 3/4″. Next I scored the 5 3/4″ side at 1 1/4″ and 4 1/2″. I then cut along these line so I had a pop up middle.
How to decorate the inside of the fancy Fold Birthday Card.
I chose to use the Daffodil Afternoon designer series paper from the January – February Sale-a-bration to decorate the card. First I cut two pieces of the dsp so that I could cover both ends of the inside without having to match up the pattern. I then cut into these two pieces so that I had the correct pieces to stick onto the card.
Next I cut mat layers for the middle of the card using Basic White card stock. I decided to use the Daisy punch to make the daisy flowers by using Basic White card stock and the Evening Evergreen Shimmer Vellum. I then punched out the stems using the Symmetrical Stems border punch.
Once I had stuck the stems and daisy onto each square piece I used the heart and line images from the Days to Remember stamp set to decorate alternate corners using Evening Evergreen ink. I finished off the daisy centres using 2021-2023 InColor Jewels and Rhinestone Basic jewels.
For the top panels I used the Happy Birthday sentiment from the Sweet Ice Cream stamp set. Then for the bottom left hand panel I due cut the number 30 from Evening Evergreen card stock using the Playful Alphabet dies. For the bottom right hand panel I used the It’s your day from the Days to remember stamp set again using Evening Evergreen ink and finished off adding three 2021-2023 InColor jewels.
How to decorate the front of the Fancy Fold Birthday Card
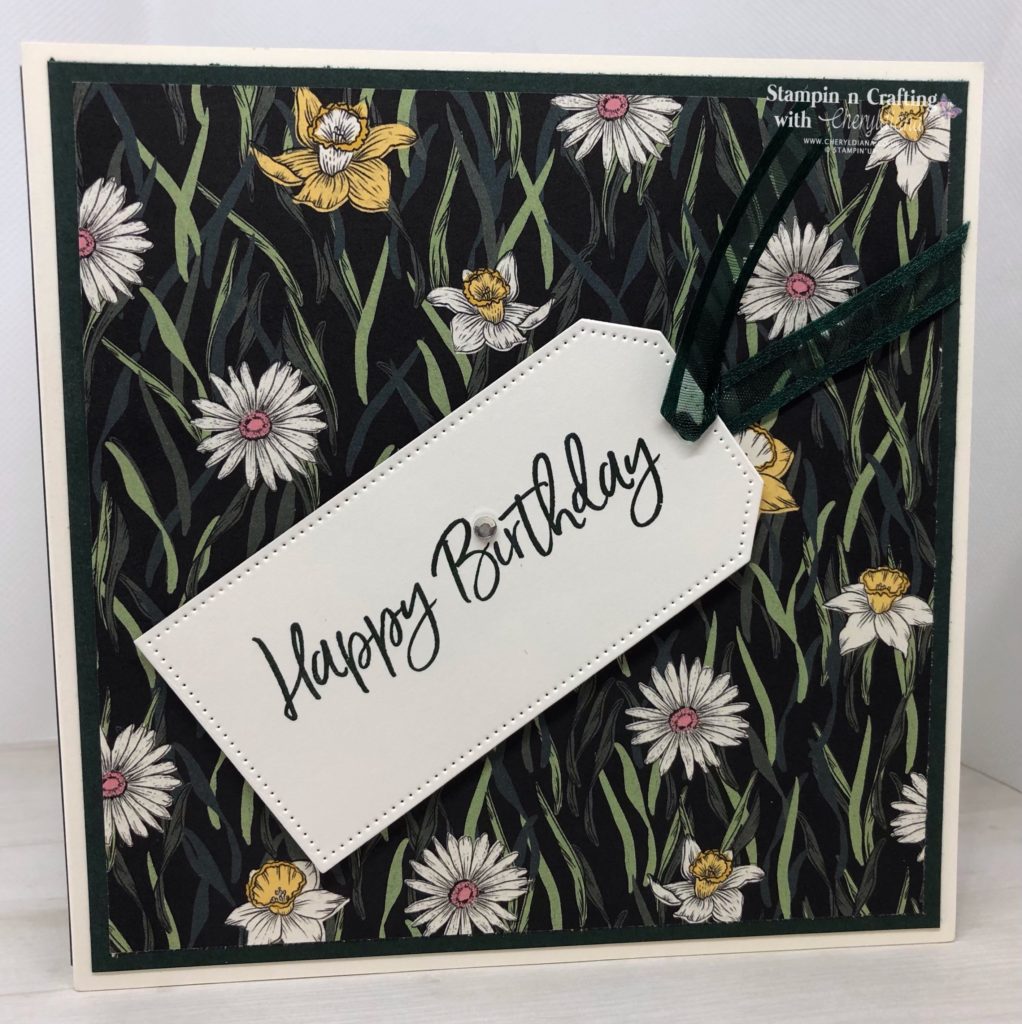
First I cut a 5 3/4″ square of Evening Evergreen card stock and stuck it to the card front. Next I cut a 5 1/2″ square of dsp and stuck that onto the mat layer.
Next I die cut a tag using Basic White card stock and the Tailor Made Tags dies. I then stamped the Happy Birthday sentiment using Evening Evergreen ink and added a piece of Evening Evergreen Open Weave ribbon for the tag tie.
How to make the back of the Fancy Fold Birthday Card

I again cut a 5 3/4″ piece of Evening Evergreen card stock and stuck it to the back of the card. Next I cut a 5 1/4″ piece of Basic White card stock. I stamped the Happy Birthday sentiment again using Evening Evergreen ink. Next I stamped the heart and lines from the xx stamp set using Evening Evergreen ink. Finally I stamped the It’s Your Day sentiment from the Days to Remember stamp set before sticking onto the back of the card.
I hope you have enjoyed seeing my Fancy Fold Birthday Card and how easy it is to decorate using a piece of bold designer series paper. I am sure you will be seeing different versions of this fancy fold card in future blogs.
Until next time, keep stampin n crafting,

Thank you for visiting my website today. Please click on the NEXT button to visit the wonderful Vicki and see what lovely project she has come up with as her showcase project. Please do leave comments as you visit each website. Thank you.

Blog Hop List
Product List
")
")
 Designer Series Paper")
 Cardstock")


 Open Weave Ribbon")


ADDITIONAL INFORMATION
- Request a free catalogue – click to request a Stampin’ Up! catalogue on the Contact me at the top of my home page.
- Go straight to my On-Line Shop
- May’sShop code is 3KEQXBG3 – Please use this when your order is less than £149
- If your order is over £150, please do not use this code.
- Remember when placing a large order or wanting to host a party then you will also get Stampin’ Rewards for any orders or party orders over £150.
- Coordinating Bundles – Save 10% on stamp sets and with matching dies or punches
- Grab a bargain at the Clearance Rack – Save up to 60% ‘whilst stocks last’
- Newsletter – Sign up for my newsletter, classes and latest special offers by clicking on the button on the right hand side of your screen
- Join Now – Get £130 worth of products for only £99. Choose from current catalogues and any specials available. Free shipping and special demonstrator benefits


Just lovely – I so enjoy a fancy fold – thanks for the inspiration
What a great fun fold Cheryl and with the dark dsp it looks so dramatic x
Beautiful card xx
Love the fancy fold, great card Cheryl.
Such a pretty card Cheryl xx